Homemade Stuffed Pizza Bread (Flower-Shaped Calzones)
This post may contain affiliate links, which means I may earn a small commission at no additional cost to you. As an Amazon Associate I earn from qualifying purchases. AHJ gifted me the bread ovens used in this post.
There’s something about homemade pizza that everyone loves, but sometimes it’s fun to change things up. These homemade stuffed pizza breads are filled with your favorite pizza toppings, wrapped in soft homemade dough, and finished with a beautiful flower-shaped crust.
Instead of making one large calzone, I made four round stuffed breads, each with a different filling. We tried chicken bacon ranch, pepperoni, sausage with pepperoni and peppers, and a ricotta cheese blend seasoned with my homemade cowboy butter seasoning.
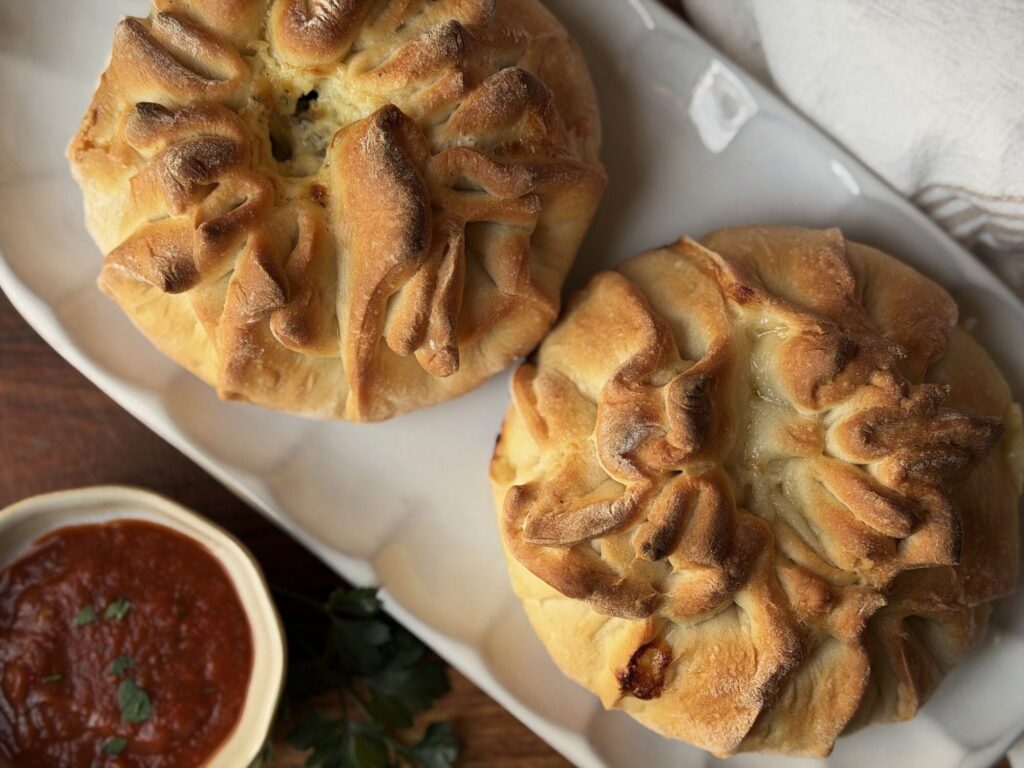
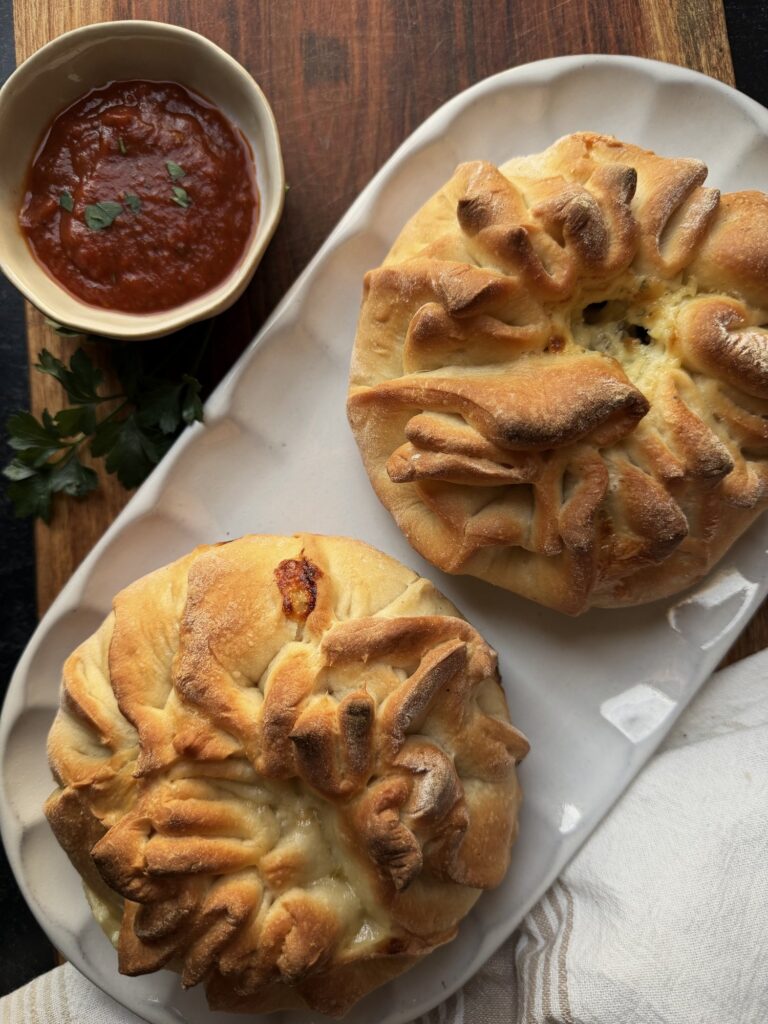
The fun part is how they’re shaped. There’s no complicated braiding involved. I simply cut the dough around the filling with kitchen scissors, then folded the sections toward the center to create the decorative top.
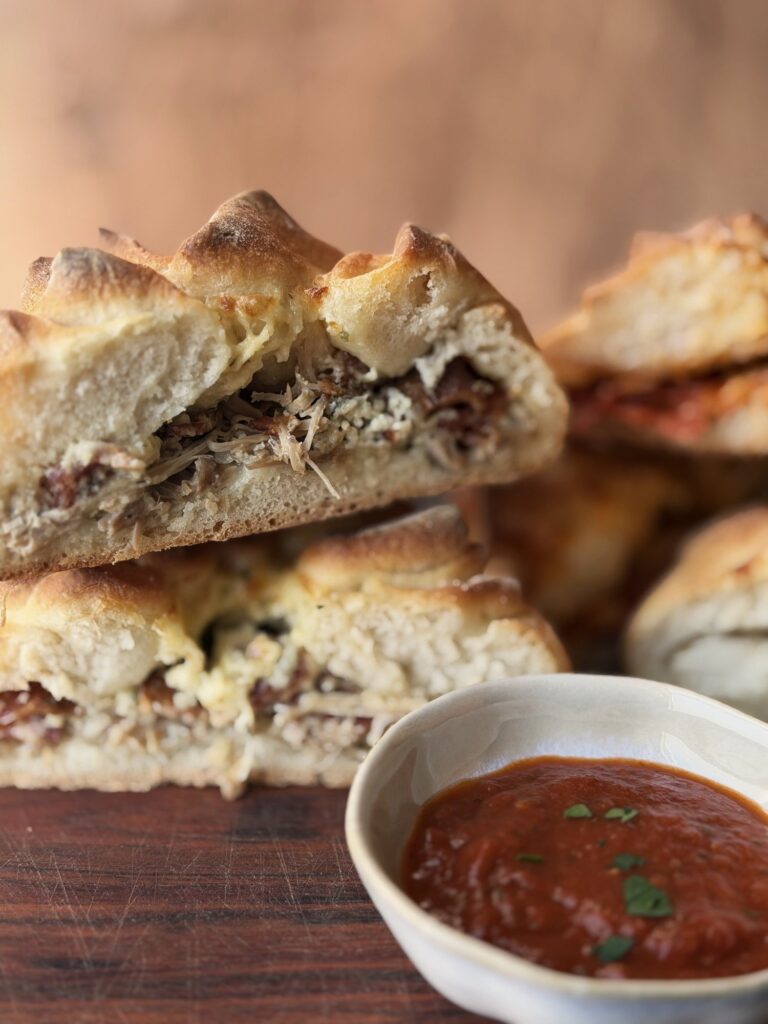
These breads can be sliced into wedges for serving, but we also discovered that some of the folded pieces could be pulled off and dipped into sauce. That wasn’t the original intention, but it was a fun bonus!
I baked mine in two AHJ dual-chamber bread ovens, but you don’t need specialty cookware to make them. I’ve included alternative baking instructions below.
Why You’ll Love This Stuffed Pizza Bread
- Customizable fillings: Make several different flavors from one batch of dough.
- Beautiful presentation: The folded dough creates a rustic, flower-like top without complicated braiding.
- Soft homemade bread: The covered cast iron baking method produced a soft bread with a golden exterior.
- Family-friendly: Everyone can choose their favorite filling, or you can slice the breads and share.
- Great for dipping: Serve with warm pizza sauce, ranch dressing, or garlic butter.
- No special pans required: You can also bake these on a regular baking sheet or in other oven-safe pans.
Ingredients for Homemade Stuffed Pizza Bread
This recipe makes four round stuffed pizza breads.
Homemade Dough
- 600 g all-purpose flour or bread flour (approximately 5 cups)
- 360 g warm water (1½ cups)
- 7 g instant yeast (2¼ teaspoons)
- 12 g fine salt (approximately 2 teaspoons)
- 25 g olive oil (approximately 2 tablespoons)
Fillings
Plan for approximately 1 cup of total filling per loaf, or about 4 cups for the entire batch.
You can use cooked meats, shredded cheese, vegetables, and sauces in almost any combination.
I initially made these with approximately ½ cup of filling per bread. They turned out great, but there was plenty of room for more. I would recommend doubling the filling for a better balance of bread and filling.
Optional Toppings
- Egg wash (1 egg beaten with 1 tablespoon water)
- Grated Parmesan cheese
- Italian seasoning
- Garlic butter
- Homemade cowboy butter seasoning
I didn’t use egg wash on my original batch, and the breads browned nicely without it. If you prefer a glossy finish, it’s an easy optional addition.
How to Make Round Stuffed Pizza Bread
Step 1: Prepare the Dough
Add the flour, yeast, and salt to the bowl of a stand mixer.
Pour in the warm water and olive oil. Mix until the dough begins to come together.
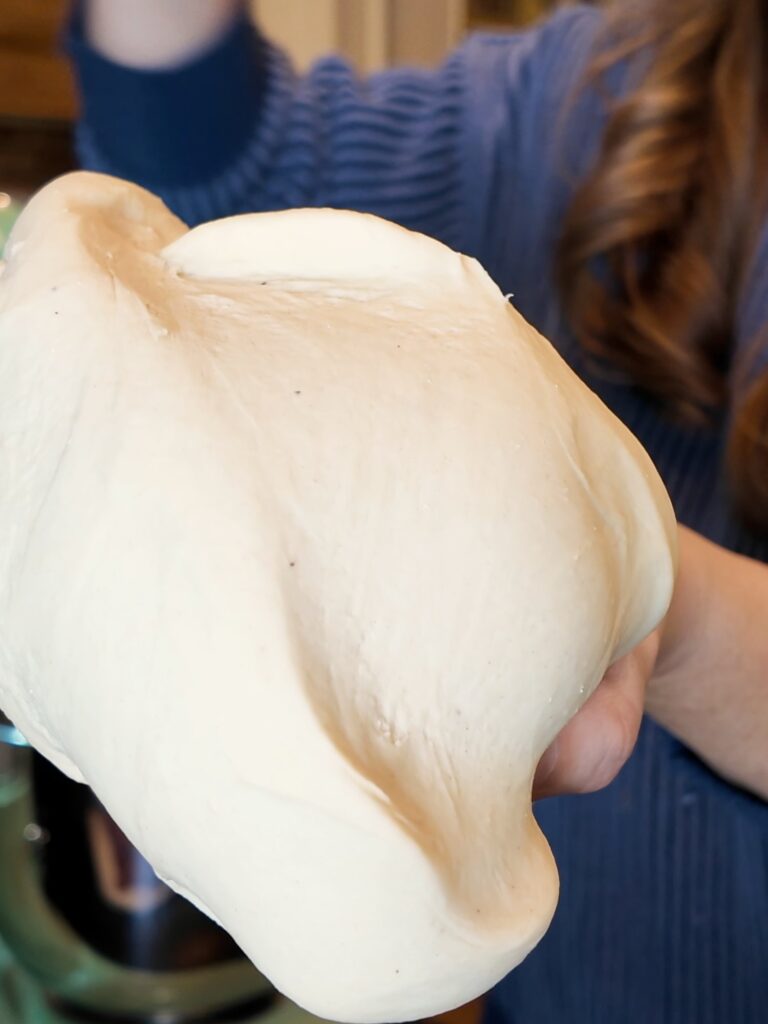
Using the dough hook, knead for approximately 7–10 minutes, until the dough becomes smooth and elastic.
The dough should be soft and slightly tacky without sticking excessively to your hands.
Transfer to a lightly oiled bowl, cover, and allow to rise until approximately doubled in size, usually 60–90 minutes depending on your kitchen temperature.
Step 2: Divide and Roll Out the Dough
Once the dough has risen, divide it into four equal portions, about 250 g each.
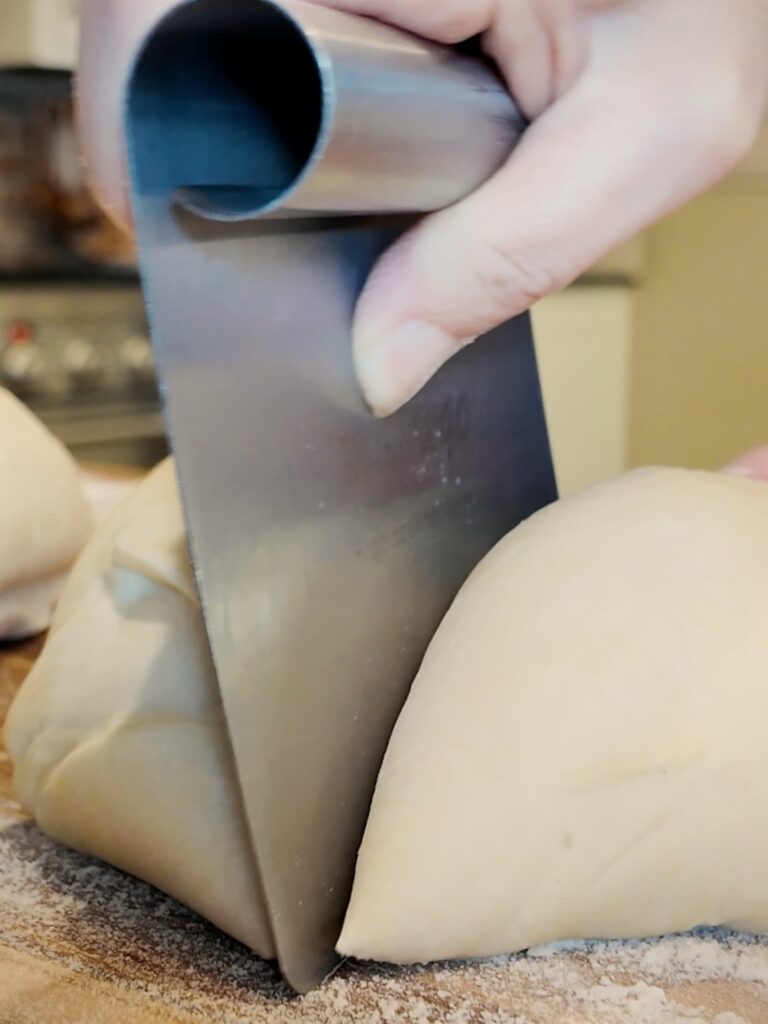
If the dough resists stretching, allow it to rest for 10–15 minutes before rolling.
Roll each portion into a circle approximately 10 inches across.
The center of the dough will become the bottom of your stuffed bread, so keep it intact.
I used the silicone slings that came with my AHJ bread ovens. I positioned the dough over the sling before adding the filling, which made transferring the finished breads much easier.
If you’re baking on a regular baking sheet, you can assemble the breads directly on parchment paper instead.
Step 3: Add the Filling
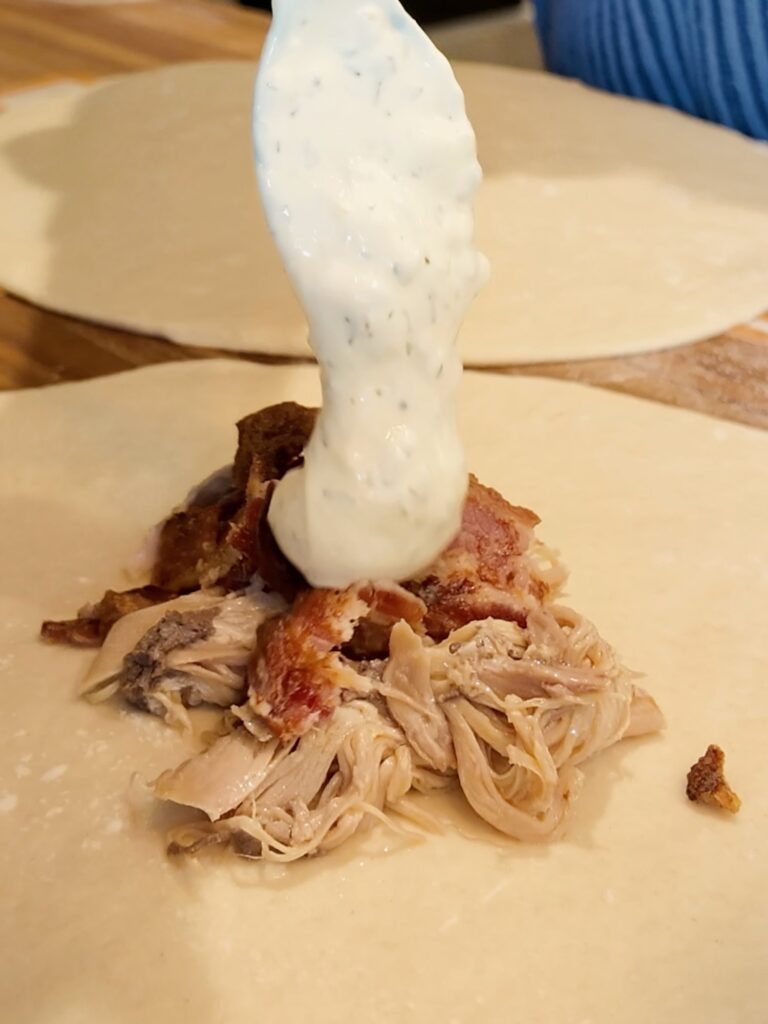
Place your chosen filling in a compact mound in the center of the dough.
Keep the filling away from the outer edges so you’ll have plenty of dough to fold over the top.
For my original batch, I used approximately ½ cup of filling per loaf. After baking, I realized the breads could easily accommodate more.
My recommendation is to use approximately 1 cup of filling per loaf, adjusting slightly depending on the ingredients.
If you’re using vegetables, sauté them first to remove excess moisture. All meat fillings should be fully cooked before assembly.
Step 4: Cut the Dough Into 12 Sections
This is where the decorative shape begins.
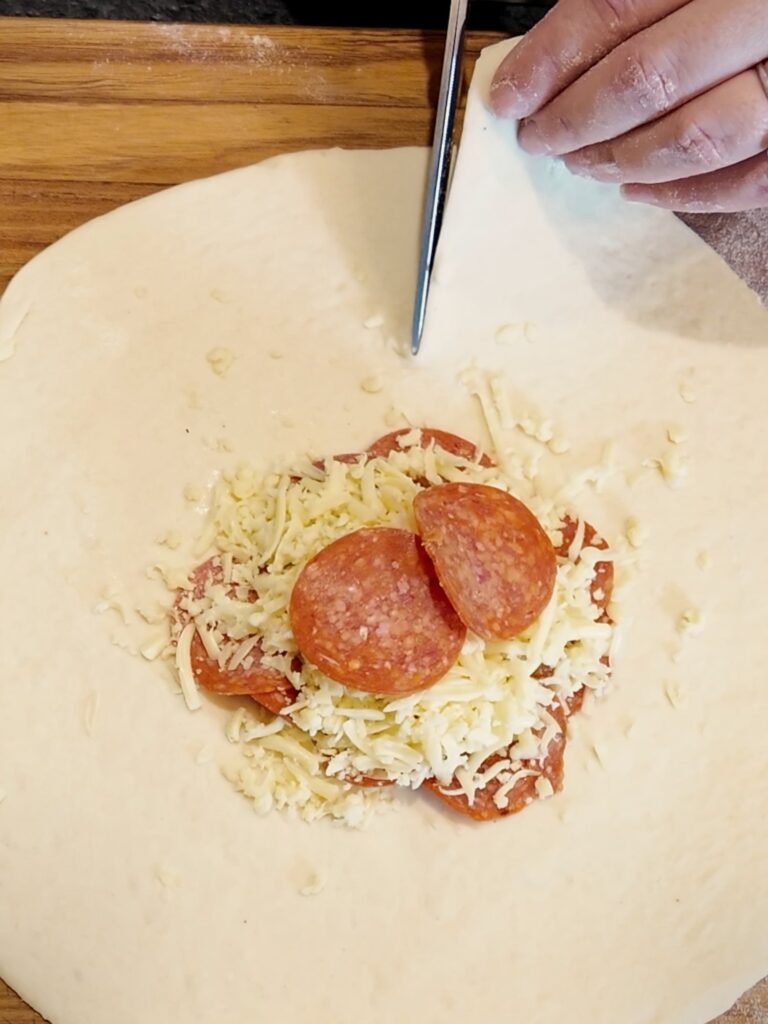
With the filling already in place, use kitchen scissors to cut the outer edge of the dough into 12 sections.
I found that cutting after adding the filling worked especially well because I could see exactly how much dough needed to remain around the center.
Make each cut inward toward the filling, stopping approximately ½ inch before reaching it.
This leaves a solid piece of dough beneath the filling while creating 12 sections around the outside.
Step 5: Create the Flower-Shaped Top
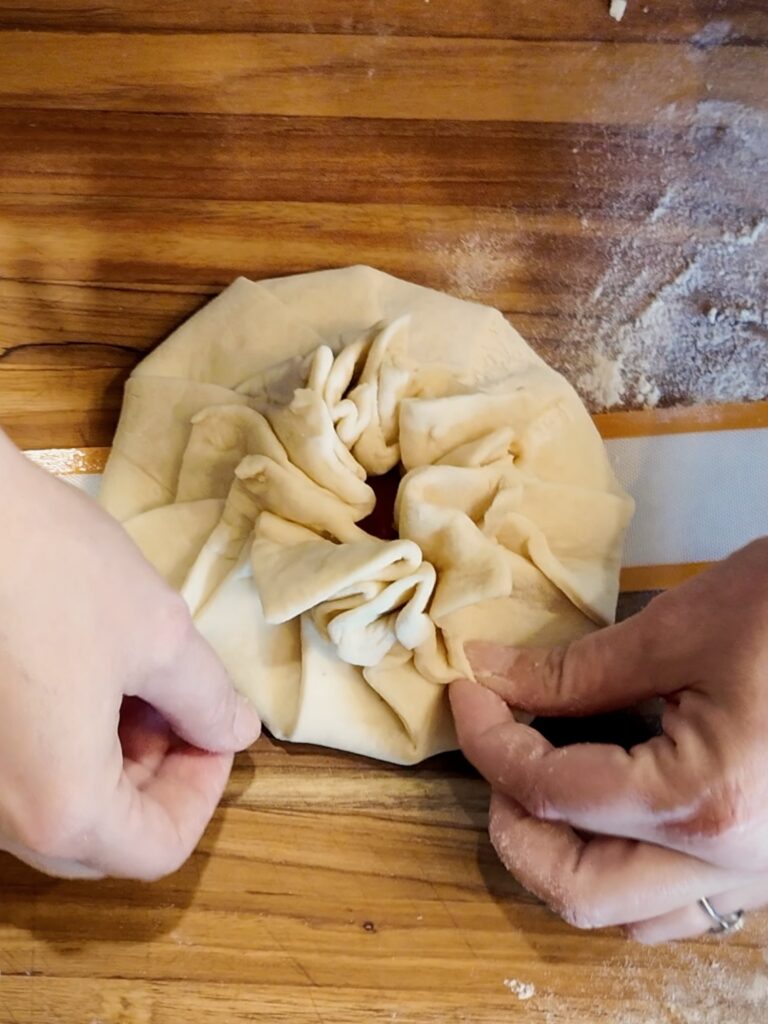
Working around the dough, pull each cut section up and toward the center of the filling.
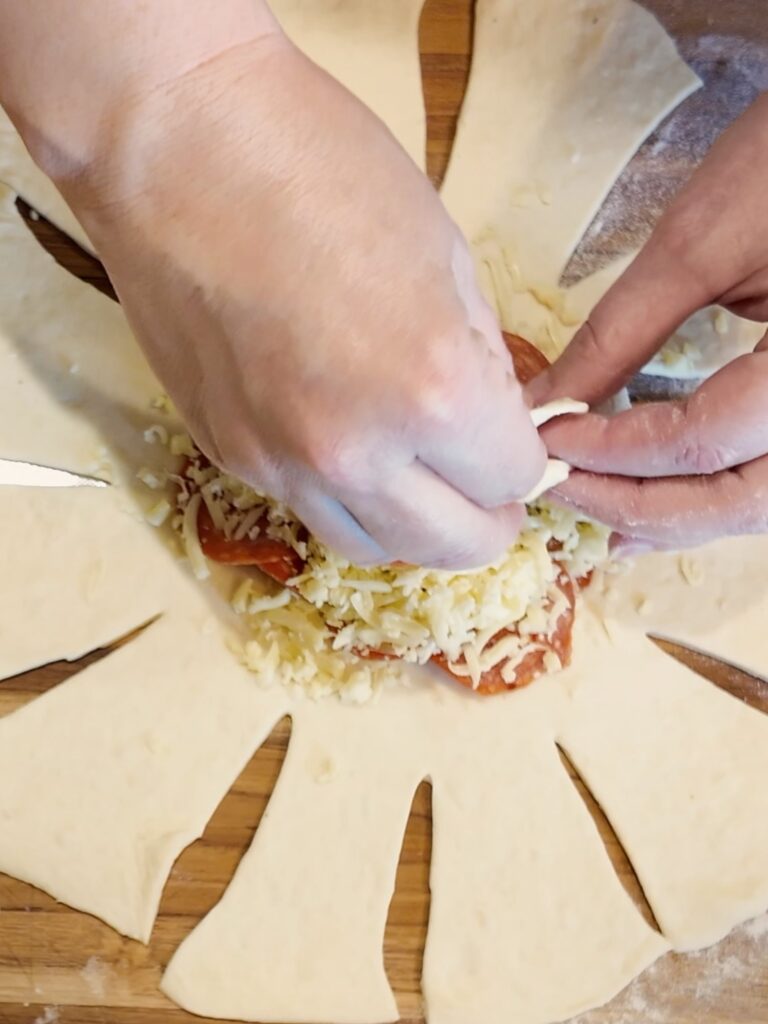
Overlap the sections as you go, pinching the dough together and turning the cut edges outward.
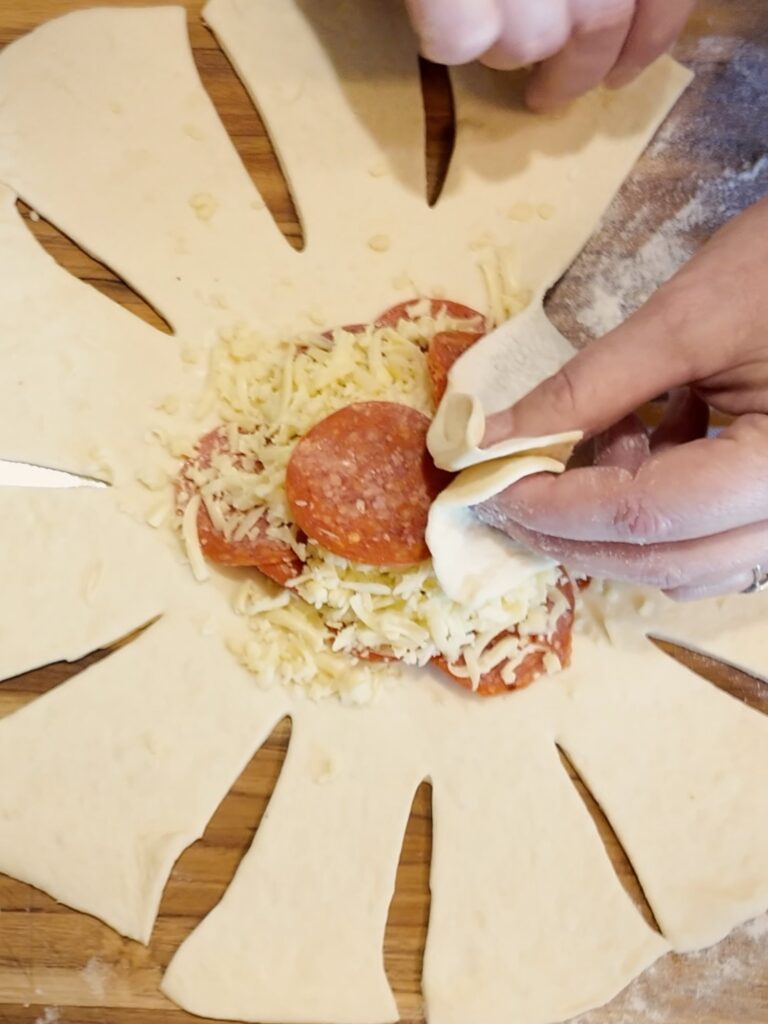
Continue until all 12 sections have been brought toward the center.
Once you’ve completed the folds, go back around the bread and pinch the seams again to help keep the filling inside.
The finished bread will have a smooth bottom and a decorative top with raised, overlapping pieces of dough that resemble flower petals.
Don’t worry about making every fold identical. The rustic appearance is part of what makes these breads so pretty.
Step 6: Transfer to Your Baking Pan
If you’re using AHJ dual-chamber bread ovens, lift the assembled breads using the silicone sling handles and lower them into the individual chambers.
I used two dual-chamber pans, which allowed me to bake all four breads at once.
The slings made transferring the stuffed dough easy without disturbing the folded tops.
I placed the breads into the room-temperature pans rather than preheating the cast iron. AHJ specifically advises against heating these bread ovens empty.
If you’re using a baking sheet or another pan, see the alternative baking instructions below.
Three Ways to Bake Stuffed Pizza Bread
You don’t need a specialty bread oven to make this recipe. The shaping technique works independently of the cookware.
The baking method will affect how quickly the crust browns and how soft or crisp the finished bread becomes.
Method 1: Covered Cast Iron Bread Ovens (My Tested Method)
I used my AHJ dual-chamber bread ovens for this recipe.
- Preheat your kitchen oven to 425°F and let it fully preheat.
- Place the assembled breads into the room-temperature cast iron chambers using the silicone slings.
- Cover with the lids and transfer the pans into the preheated kitchen oven.
- Bake covered for 25 minutes.
- Carefully remove the lids and continue baking for approximately 20 additional minutes, watching for your desired level of browning.
- Remove from the oven and allow the breads to rest for 5–10 minutes before slicing.
The total baking time for my original batch was approximately 45 minutes.
This method produced soft bread with a golden exterior and nicely browned decorative folds.
Important: Follow the care instructions for your specific cookware. My AHJ bread ovens should not be preheated empty.
Method 2: Regular Baking Sheet (Untested Alternative)
If you don’t have covered cast iron bread ovens, a regular baking sheet is a simple alternative.
- Preheat the oven to 375°F.
- Line a baking sheet with parchment paper.
- Assemble the breads directly on the parchment, leaving several inches between them.
- Brush with egg wash if desired.
- Bake uncovered for approximately 25–35 minutes, checking for browning and doneness.
- If the folded tops become too dark before the dough is cooked through, loosely tent with aluminum foil.
- Rest for 5–10 minutes before serving.
The exposed dough may develop a slightly firmer crust than the covered cast iron version.
Note: This baking-sheet method is a suggested starting point and has not yet been tested with this recipe.
Method 3: Round Cake Pans or Cast Iron Skillets (Untested Alternative)
Individual round cake pans or appropriately sized cast iron skillets can also help maintain the rounded shape.
- Preheat the oven to 375°F.
- Lightly grease the pans or line them with parchment.
- Place one assembled bread into each pan, allowing room for expansion.
- Bake uncovered for approximately 30–40 minutes, checking early for browning.
- Tent loosely with foil if the tops brown too quickly.
- Rest briefly before removing from the pans and slicing.
Note: This method is a suggested starting point and has not yet been tested with this recipe. Times are estimates and may vary depending on the size, depth, and material of your pans.
How to Tell When the Bread Is Done
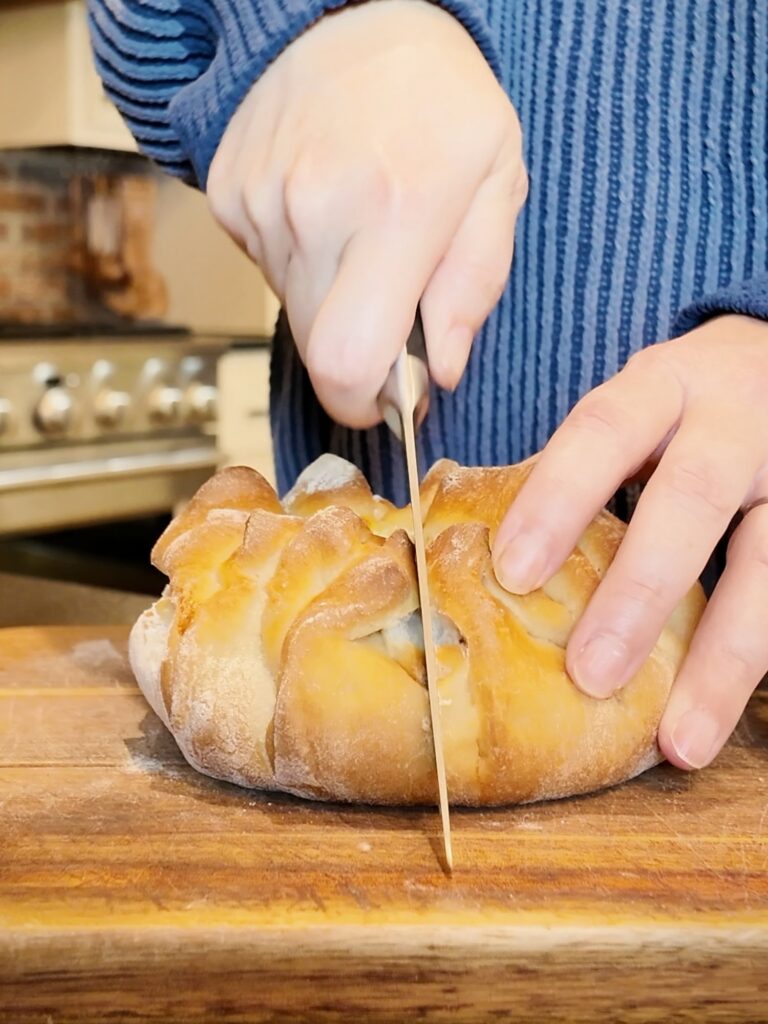
The exterior should be golden brown, and the dough should be fully baked, especially along the bottom and beneath the filling.
If you use an instant-read thermometer, check the bread portion rather than the cheese or meat filling. A temperature around 190–200°F can be a useful guide for this type of dough.
The center should not appear wet or gummy when cut.
The Four Stuffed Pizza Bread Fillings I Made
I wanted to make several different flavors without preparing four completely separate meals.
These are the combinations I used for my original batch.
The suggested quantities below reflect the fuller portions I’d recommend for future batches, rather than the smaller amounts I used during testing.
1. Chicken Bacon Ranch Stuffed Bread
- ½ cup cooked, shredded chicken
- ¼ cup shredded mozzarella
- 2 tablespoons cooked, crumbled bacon
- 1–2 tablespoons ranch dressing
Toss the chicken with the ranch dressing before adding it to the dough. Top with mozzarella and bacon, then fold and seal.
I didn’t add pizza sauce to this version.
2. Classic Pepperoni Stuffed Pizza Bread
- ½ cup shredded mozzarella
- ¼ cup pepperoni slices
- 2 tablespoons thick pizza sauce
- 1–2 tablespoons grated Parmesan, optional
Add the pizza sauce to the center of the dough, followed by the mozzarella and pepperoni.
This is a classic combination that works especially well served with additional warm pizza sauce for dipping.
3. Sausage, Pepperoni, and Peppers Stuffed Bread
- ⅓ cup cooked, crumbled sausage
- ¼ cup pepperoni
- ¼ cup shredded mozzarella
- 2 tablespoons sautéed bell peppers
- 1–2 tablespoons thick pizza sauce
Cook the sausage completely and sauté the peppers before assembling.
Add the sauce, sausage, pepperoni, peppers, and cheese to the center of the dough.
This was another version where I used pizza sauce inside the bread.
4. Ricotta and Cheese Stuffed Bread with Cowboy Butter Seasoning
- ½ cup ricotta cheese
- ⅓ cup shredded mozzarella or Italian cheese blend
- 1–2 tablespoons grated Parmesan
- Homemade cowboy butter seasoning, to taste
Combine the cheeses and mound them in the center of the dough.
Before folding the dough over the filling, sprinkle the cheese mixture with cowboy butter seasoning.
I used the seasoning dry, without adding butter.
The combination gave the cheese filling plenty of flavor without needing pizza sauce inside.
You can find my homemade cowboy butter seasoning recipe here.
More Stuffed Pizza Bread Filling Ideas
One of the best things about this recipe is how easily you can customize it.
Once you’ve learned the folding technique, you can use almost any combination of ingredients you’d enjoy on pizza or inside a calzone.
Pesto Chicken and Mozzarella: Cooked chicken, basil pesto, mozzarella, and Parmesan. Mix the pesto into the chicken before filling to keep excess oil away from the dough.
Pesto, Mozzarella, and Sun-Dried Tomatoes: A meatless option with pesto, mozzarella, Parmesan, and well-drained sun-dried tomatoes.
Ham and Cheddar: Diced ham, shredded cheddar, and a little Dijon mustard.
Spinach and Ricotta: Cooked, well-drained spinach, ricotta, mozzarella, and garlic.
BBQ Chicken: Shredded cooked chicken, barbecue sauce, cheddar or mozzarella, and finely chopped red onion.
Buffalo Chicken: Cooked chicken tossed with buffalo sauce and topped with Monterey Jack or mozzarella. Serve with ranch dressing.
Breakfast Stuffed Bread: Cooked breakfast sausage, softly scrambled eggs, and shredded cheddar.
The possibilities are nearly endless, and this is a great way to use leftover cooked meats or vegetables from other meals.
Tips for the Best Homemade Stuffed Pizza Bread
Cut the Dough After Adding the Filling
This was one of the most helpful things I discovered while making these.
Rather than cutting the dough first, I added the filling and then used kitchen scissors to make the 12 cuts.
This allowed me to leave approximately ½ inch around the filling before the cuts began.
Make 12 Cuts for the Decorative Top
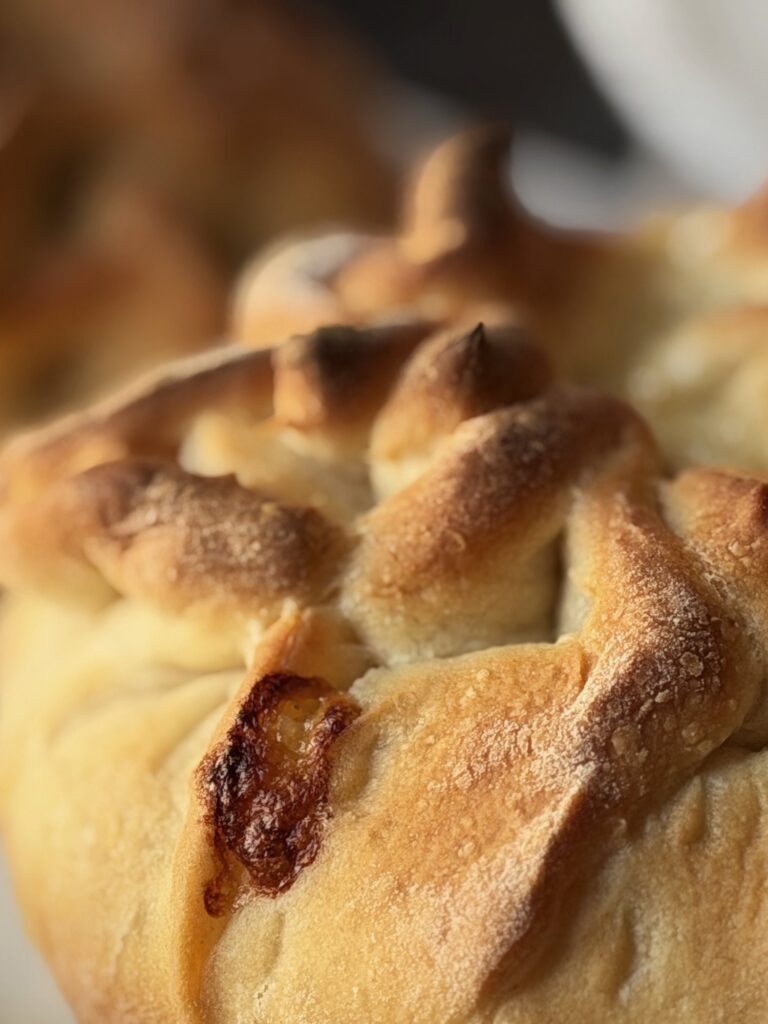
Twelve sections worked well for creating the overlapping, flower-like appearance.
Each section is folded toward the center, pinched, and arranged with the cut edges turned outward.
Pinch the Seams Twice
After folding all 12 sections toward the center, go back and pinch the seams again.
This helps keep the filling inside as the bread expands during baking.
Don’t Be Shy With the Filling
I originally used approximately ½ cup of filling per loaf.
The breads baked beautifully, but I would have preferred a higher filling-to-bread ratio.
For future batches, I recommend starting with approximately 1 cup of filling per loaf.
Keep Wet Ingredients Under Control
Use thick pizza sauce rather than a watery sauce.
Cook vegetables before adding them, and drain excess liquid from ingredients such as spinach or sautéed mushrooms.
Egg Wash Is Optional
I didn’t use egg wash when testing these breads, and they still developed a beautiful golden color.
If you prefer a shinier finish, brush the folded tops with a beaten egg and a little water before baking.
The Folded Pieces Make Great Dippers
Although these breads are designed to be sliced and served like round calzones, we discovered that some of the folded pieces could be pulled off.
They made great little bread dippers for the pizza sauce!
I wouldn’t consider this a traditional pull-apart bread, but it’s a fun way to enjoy the decorative crust.
What to Serve With Stuffed Pizza Bread
These breads are hearty enough to serve as a meal, especially when filled with meat and cheese.
For dipping, try:
- Warm pizza sauce or marinara
- Ranch dressing
- Garlic butter
- Homemade cowboy butter
- Pesto
A simple green salad, roasted vegetables, or fresh fruit would round out the meal.
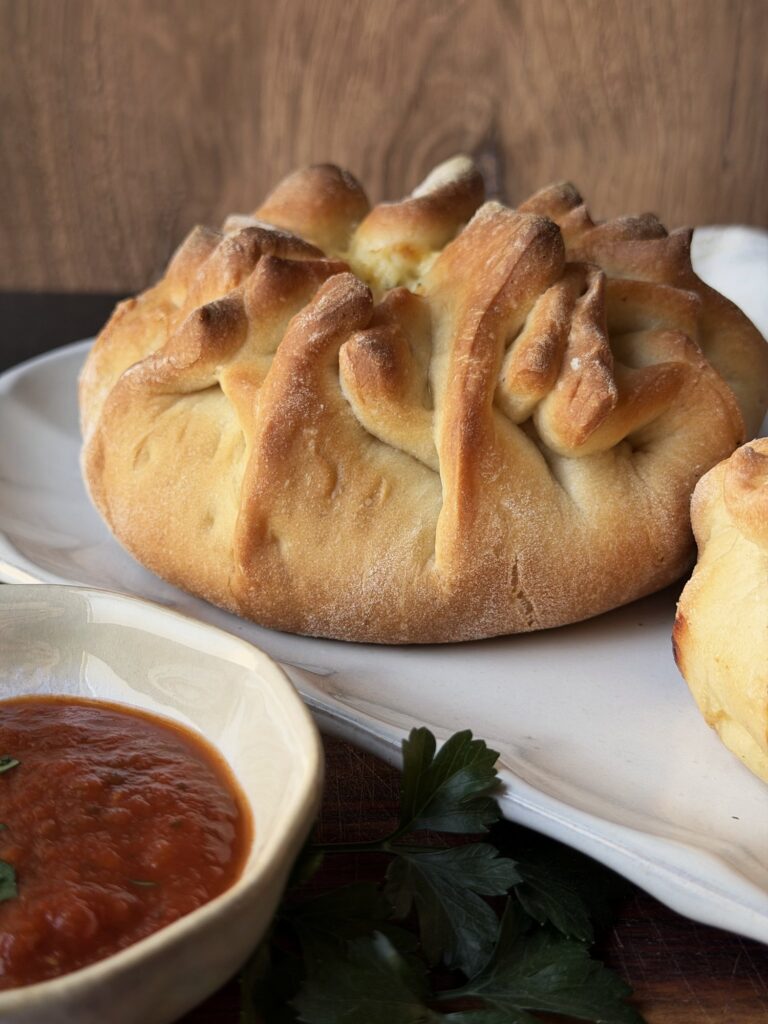
For a family dinner, I like the idea of slicing all four breads and allowing everyone to try several flavors.
How to Store and Reheat Leftovers
Allow leftover stuffed pizza bread to cool before storing.
Refrigerate in an airtight container for up to 3–4 days.
To reheat, place slices in a 350°F oven until heated through. An air fryer also works well if you prefer a slightly crispier crust.
You can freeze the baked breads or individual portions for up to 2–3 months for best quality.
Wrap tightly, thaw in the refrigerator, and reheat until hot throughout.
Frequently Asked Questions
Is stuffed pizza bread the same as a calzone?
They’re very similar. Both are made with pizza-style dough wrapped around savory fillings.
Traditional calzones are usually folded into half-moon shapes. These are formed into round loaves with overlapping dough sections that create a decorative, flower-like top.
Can I use store-bought pizza dough?
Yes. Prepared pizza dough is an easy shortcut. Divide it into portions that fit your pans and follow the same filling and shaping instructions.
Do I need special bread pans?
No. I used AHJ dual-chamber bread ovens, but you can also bake these on a regular baking sheet or in other appropriately sized oven-safe pans.
The baking times may vary depending on the cookware.
Why do you cut the dough after adding the filling?
Adding the filling first makes it easier to judge where the cuts should stop.
I used kitchen scissors and left approximately ½ inch between the filling and the beginning of each cut.
How many cuts do I need?
I used 12 cuts around each round of dough. This created enough sections to fold toward the center and form the decorative top.
How much filling should I use?
I recommend approximately 1 cup of filling per loaf.
My first batch used closer to ½ cup, and although the breads turned out well, they could have used more filling.
Can I pull the bread apart instead of slicing it?
The breads are designed to be sliced, but some of the folded pieces can be pulled off and used for dipping.
We tried this with ours, and it worked well!
Do I need to preheat my cast iron bread ovens?
Follow the instructions for your particular cookware.
My AHJ bread ovens advise against preheating them empty, so I placed the assembled breads into the room-temperature pans and transferred them into the preheated kitchen oven.
Can I make the dough ahead of time?
Yes. After kneading, you can refrigerate the covered dough overnight, allowing room for it to rise.
Bring it out of the refrigerator and let it become easier to handle before dividing, rolling, and assembling.
A Different Way to Enjoy Homemade Pizza Night
These homemade stuffed pizza breads were a fun change from our usual pizza night.
I loved being able to make four different flavors from one batch of dough, and the decorative folded tops made them look like something much more complicated than they actually were.
The silicone slings made transferring the breads easy, and baking them in the cold cast iron pans worked beautifully.
Next time, I’ll definitely add more filling. But the dough, shaping method, and baking process all worked well, and the bread stayed wonderfully soft.
Whether you make classic pepperoni, chicken bacon ranch, or come up with your own combination, these round stuffed pizza breads are a fun way to bring something different to the dinner table.
And don’t forget the dipping sauce!
A Few Things I Use
Disclosure: AHJ gifted me these bread ovens. The links in this section are also affiliate links. My recommendation is based on how I actually use them.
- AHJ Dual-Chamber Bread Oven: Enameled cast iron double loaf pan with a lid. I baked all four stuffed breads in two of these, loaded at room temperature.
- Instant-Read Thermometer: Handy for checking the bread portion for doneness.
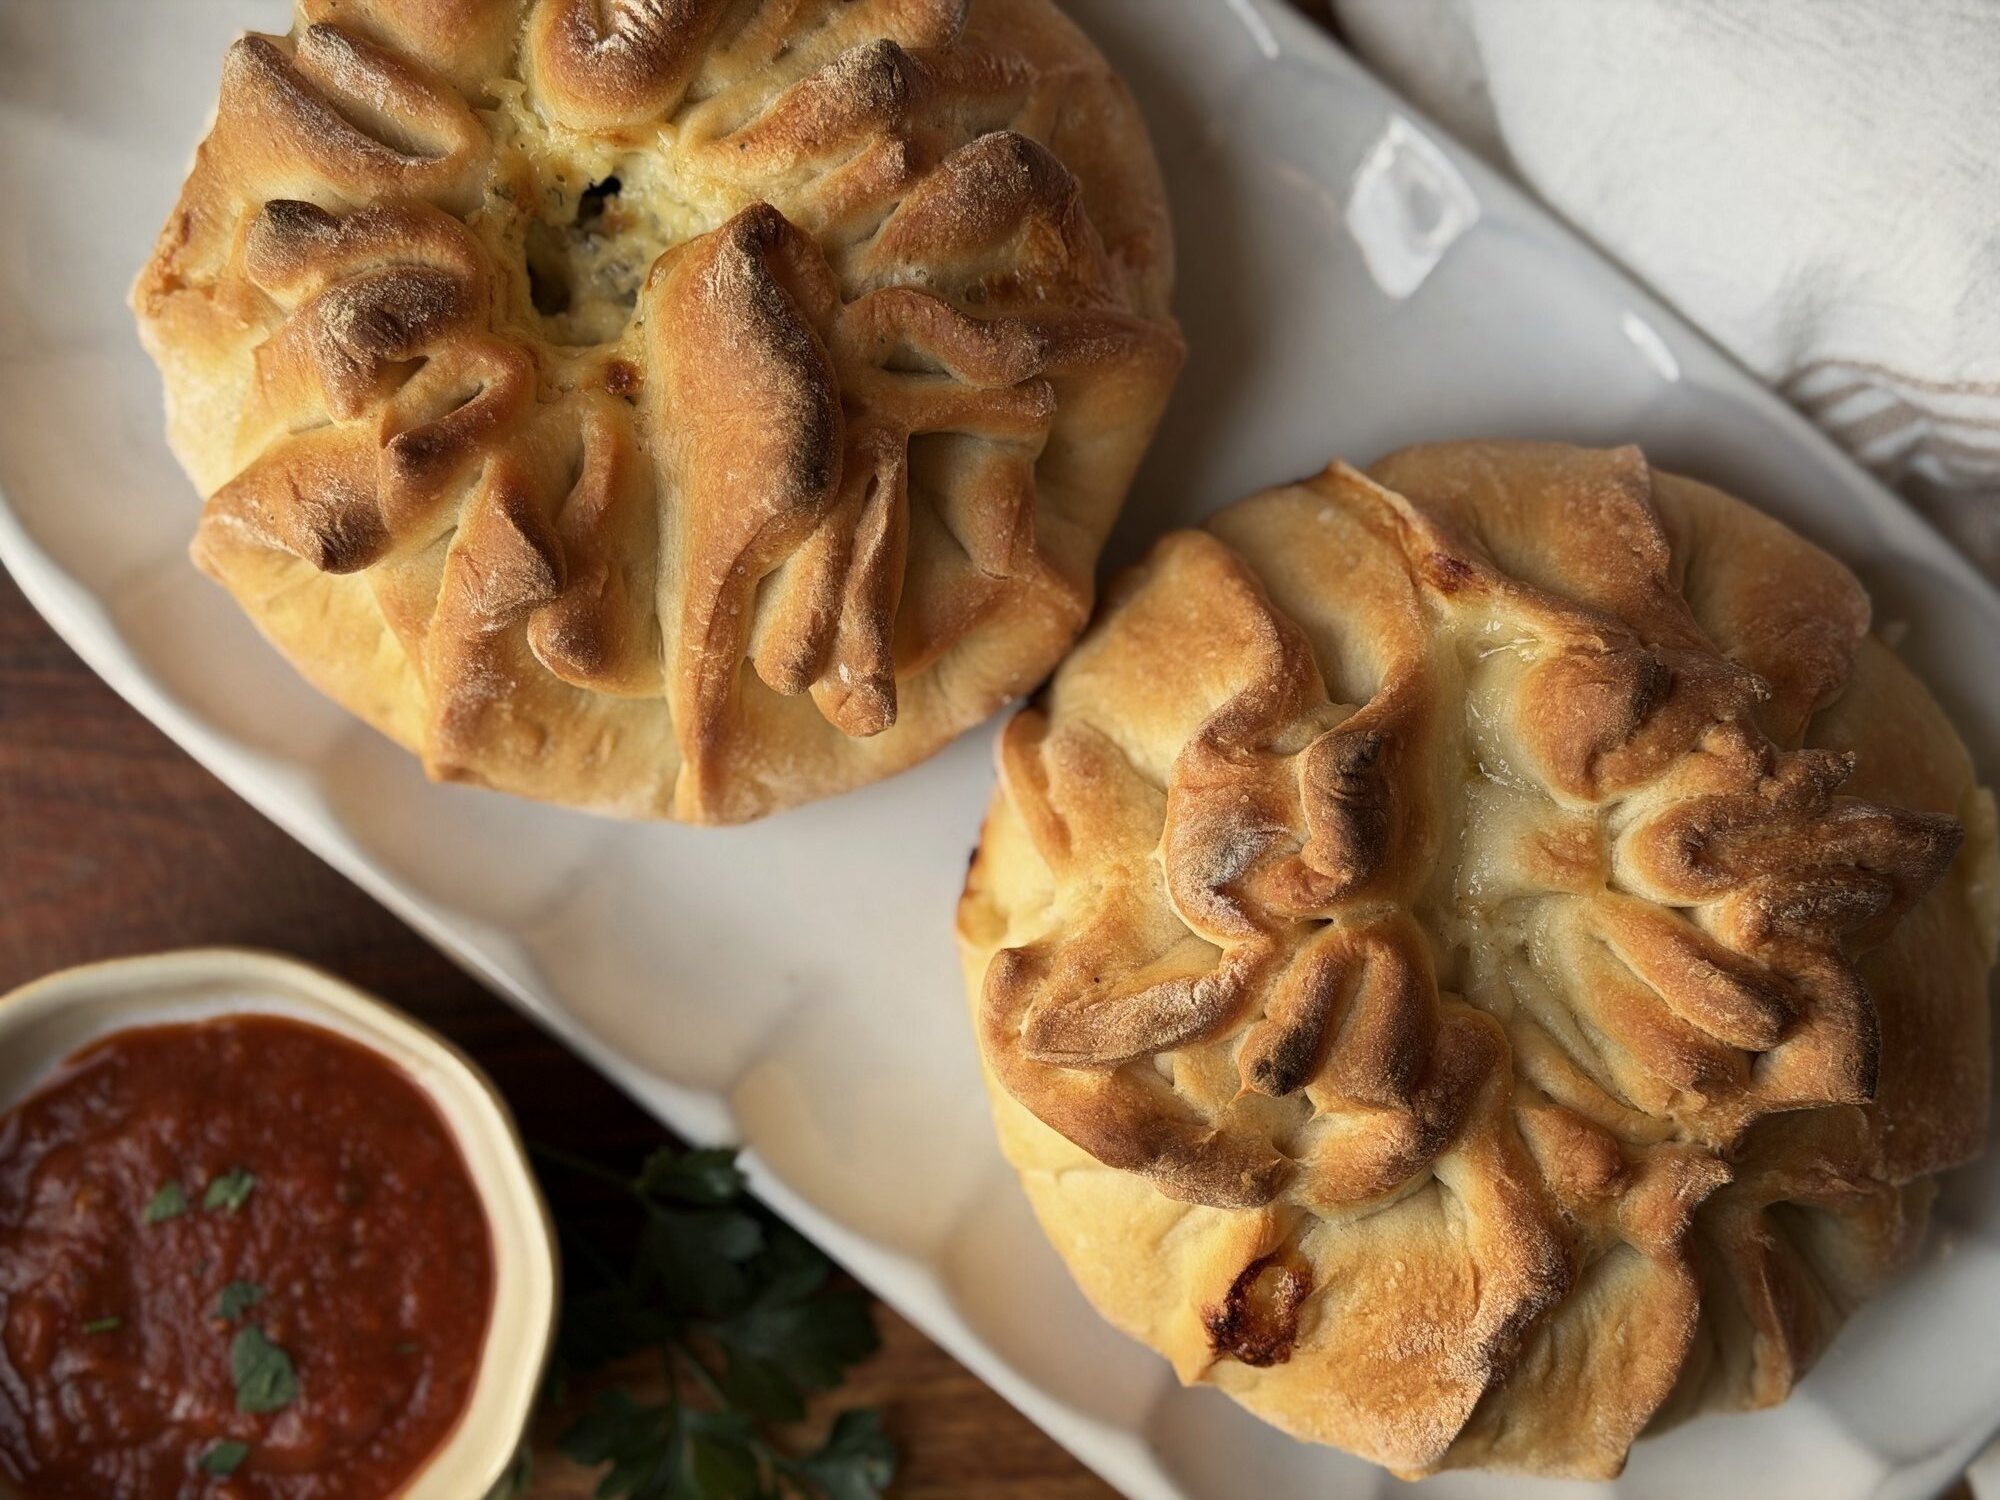
Homemade Stuffed Pizza Bread (Flower-Shaped Calzones)
Ingredients
Equipment
Method
- Combine the flour, yeast, salt, water, and olive oil. Knead until smooth and elastic, approximately 7–10 minutes.
- Cover and allow the dough to rise until doubled, approximately 60–90 minutes.
- Divide into four equal portions, about 250 g each. Rest 10–15 minutes if needed.
- Roll each portion into a circle approximately 10 inches across.
- Position the dough over a silicone sling or prepared baking surface.
- Mound approximately 1 cup of prepared filling in the center.
- Using kitchen scissors, cut the outer dough into 12 sections, stopping approximately ½ inch before the filling.
- Pull each section toward the center, overlapping and pinching the dough while turning the cut edges outward.
- Once all 12 sections are folded, go back and pinch the seams again.
- Transfer the assembled breads into room-temperature AHJ bread ovens.
- Place the covered pans into a fully preheated kitchen oven at 425°F.
- Bake covered for 25 minutes.
- Remove the lids and bake approximately 20 additional minutes, until golden brown and fully baked.
- Rest 5–10 minutes before slicing and serving.
Notes
- I used approximately ½ cup of filling per loaf during my original test, but recommend increasing to approximately 1 cup.
- Egg wash is optional. I did not use it during testing.
- Use cooked meats and well-drained vegetables.
- The round flower-like design is created from one piece of dough.
- The folded crust pieces can also be pulled off and dipped into sauce.
- The AHJ bread ovens were loaded cold, in accordance with the manufacturer’s instructions.
- Bake times may vary depending on your cookware and filling.